Install and Register
Download Node-Wizard and Node-Client
-
Download Version 0.3.0 of Node-Wizard and Node-Client from Download Page
node-wizard-0.3.0-ubuntu22.tgz
node-client-0.3.0-ubuntu22.tgz
Prepare KVM (BareMetal) Host for Node-Wizard
Before we proceed, we need a bridge, network configuration information for VMs.
-
Network Bridge : if a bridge with Internet connection already exists, it can be used. If such a bridge does not exist, please create one. The below figure shows the structural change to netplan file for bridge creation.
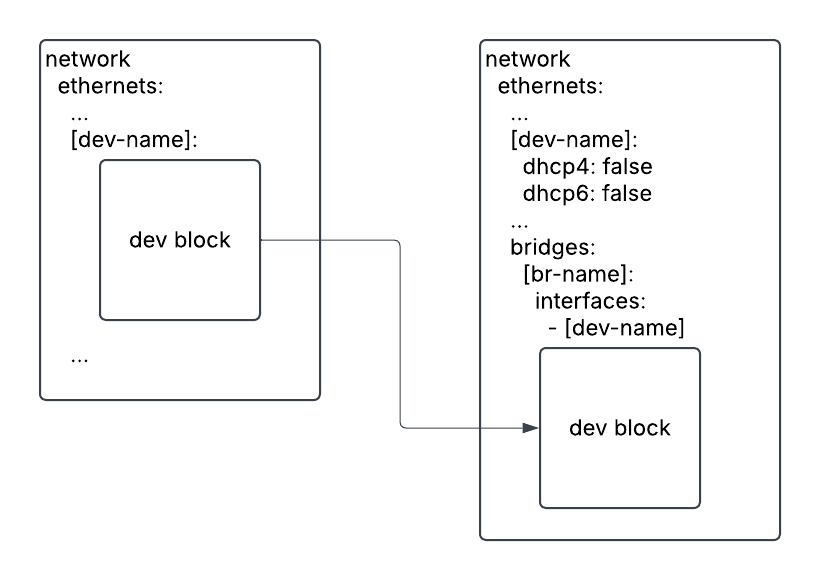
Please see bridge creation how-to for detailed description. To apply a new netplan file,
$ sudo netplan generate     # check validity of netplan configuration
$ sudo netplan apply
$ ip -4 -br a show # Verify the newly created bridge -
Network Configuration Information for VMs
# Gateway IP address
ip route show | grep default | head -1 | cut -d" " -f3

# Nameserver IP addresses
resolvectl status | grep "Current DNS" | head -1 | cut -d " " -f4
bridge name, gateway IP address and name server are necessary for node-wizard installation.
Install Node-Wizard
The deploy script will download Ubuntu ISO images (20.04.4, 22.04.2, 24.04.1).
If these ISO files are in /storage/VM/iso directory, the download step will be skipped.
Using these commands, we can download the ISO files separately.
wget https://old-releases.ubuntu.com/releases/20.04/ubuntu-20.04.4-live-server-amd64.iso
wget https://old-releases.ubuntu.com/releases/22.04/ubuntu-22.04.2-live-server-amd64.iso
wget https://old-releases.ubuntu.com/releases/24.04/ubuntu-24.04.1-live-server-amd64.iso
sha256sum for these ISO files
28ccdb56450e643bad03bb7bcf7507ce3d8d90e8bf09e38f6bd9ac298a98eaad *ubuntu-20.04.4-live-server-amd64.iso
5e38b55d57d94ff029719342357325ed3bda38fa80054f9330dc789cd2d43931 *ubuntu-22.04.2-live-server-amd64.iso
e240e4b801f7bb68c20d1356b60968ad0c33a41d00d828e74ceb3364a0317be9 *ubuntu-24.04.1-live-server-amd64.iso
-
Extract node-wizard tarball and deploy node-wizard
$ tar xvf node-wizard-0.3.0-ubuntu22.tgz
$ cd node-wizard-0.3.0/
$ ./deploy-node-wizard.sh
Please enter gateway ip address for configuring vm's network :
[gateway ip address]
Please enter nameservers for configuring vm's network :
[name(DNS) server]
Please enter virsh pool name for ceph rbd if exists :

Please enter default bridge name for vmcreate :
[bridge name]
Retrieving all needed dependencies
...warningThe link for the Ubuntu 24.04 ISO file in the deploy script might be outdated.
You might need to download the ISO file manually. -
Finally, we verify deployment by checking the Node Wizard status. It should be in a running state.
$ sudo systemctl status node-wizard.service
Install Node-Client
Now, we will install node-client on the same host.
- Extract node-client tarball and deploy node-client
$ tar xzf node-client-0.3.0-ubuntu22.tgz
$ cd node-client-0.3.0
$ ./deploy-node-client.sh
Register node-wizard host and Obtain a license
- We will register the localhost. First, get the token value from node-wizard host.
Then, use this token to register the host with node-client.
$ sudo /root/bin/node_wizard/node-wizard --token$ node-client -c register-server -S localhost -token [token]
$ node-client -c list-server - Next, we will request a free 7-day trial license through the Node Client.
$ node-client -c request-license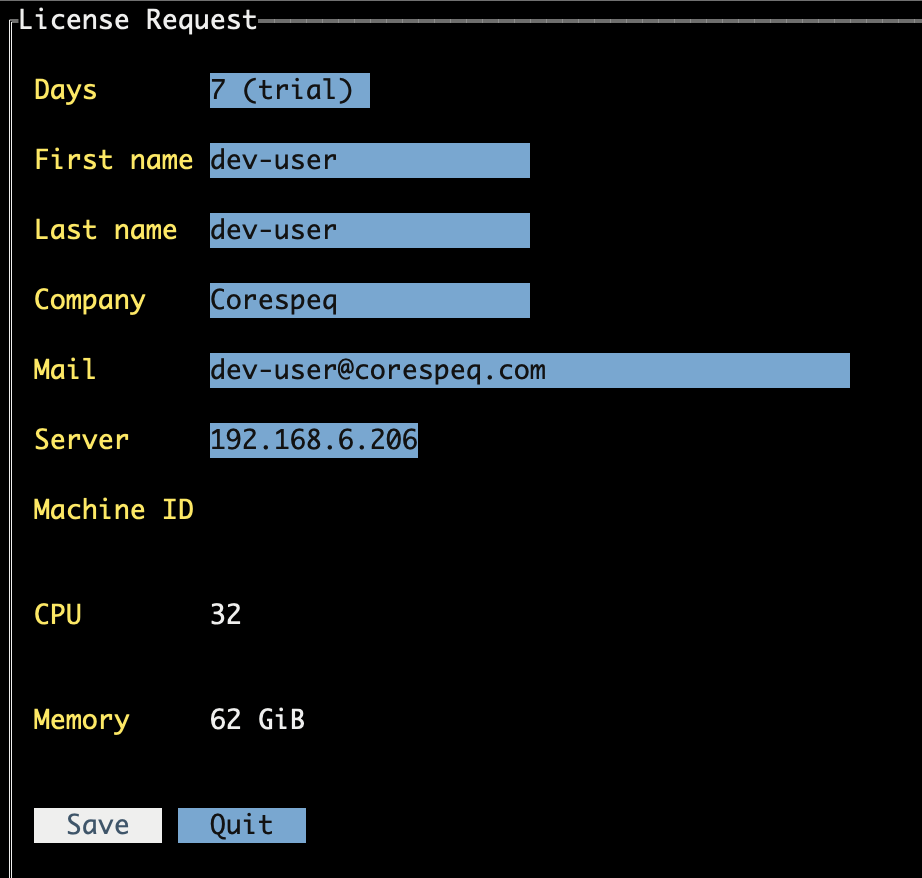
- After requesting a license, we will receive an email with a license file attached. We download the license file and set it for the server.
$ node-client -c set-license -f license.txt - Finally, we are ready to manage VMs on this host.